Gen2/Rear Wheel Removal
From Unofficial Zero Manual
Pulling out the axle and removing the rear wheel is straightforward; the complexity is in re-assembly: see Rear Wheel Install.
- Items to note for re-assembly
- Note how the caliper sits against the swingarm.
- Note the order and arrangement of the spacers.
- Video Guide
- Zero Motorcycles: Rear Wheel Removal 2016 DSR by E Shattow
- Tools
- 27mm socket
- Breaker bar
- Instructions
- Place the motorcycle on a lift or rear stand so the wheel spins freely.
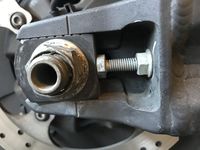
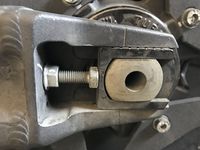
- Mark/photograph where the alignment marks reside on each side of the axle for re-alignment when re-installing the wheel.
- Loosen the rear axle nut on the right side (27mm) with the breaker bar.
- Remove the rear axle nut.
- Pull the axle part-way out so that the wheel can be moved forward enough to loosen the belt.
- Pull the belt off of the rear sprocket and let it hang outside of the swingarm slightly to avoid interfering with the wheel.
- Pull the axle through the wheel from the left side.
- Pay attention to the brake caliper: it's attached via the axle, and when the axle is removed the caliper, etc, will come loose.
- Set aside the spacers with alignment marks, noting which goes on which side.
- Set aside the axle and axle nut.
- Pull the wheel out behind the swingarm.
- The license plate tail holder will likely require rolling the wheel out at an angle to clear it.

