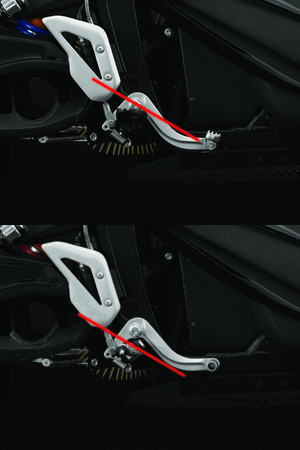
Gen2/Rear Brake Actuator
From Unofficial Zero Manual
< Gen2(Redirected from Brake Pedal)
The rear brake is manipulated by a dirt-bike style pedal around the right footpeg, a common motorcycle configuration.
- The rear brake has its own master cylinder behind the rear footpeg on the right.
- Pedal Construction
- Cast aluminum with a powder coat finish.
- On pre-2015 models, the pedal is made from a single piece.
- On 2015+ models, the pedal toe actuator is bolted on (M6X20-8.8) and may be replaced or have an S vs DS toe actuator swap.
- Rear Brake Switch
- The rear brake switch is activated hydraulically by pressure in the rear brake system.
- The rear brake switch is built into top banjo bolt.
- Rear Brake Pedal
- The threaded rod from the brake lever to the master cylinder adjusts lever height.
- Rear Brake Pedal Adjustment
- The rear brake pedal is adjustable at the clevis.
- Remove the pin.
- The pin is the part that connects the brake pedal to the clevis.
- The clevis is the fork shaped part that goes either side of the sheet metal pedal.
- Loosen the actuator shaft locknut above the clevis.
- Grip the shaft firmly with (say) long heavy-duty needle-nose pliers.
- Rotate the shaft clockwise (back toward the rear of the bike) to lower the pedal foot.
- Or counterclockwise (towards the front) to raise the pedal foot up.
- Tighten the locknut back up to hold the clevis in place.
- Put the pin back in.
- Rear Brake Pedal Spring
- On most models, there is a spring suitable for a dirt bike that is over-designed for a street bike.
- There is a kind of spring inside the brake pump, so the external one is just to keep the foot-pedal without rattling.
- Suggestion: Remove the rear brake spring or replace it with a lighter spring.
- Test the rear brake after doing this.
- References
- Re: [2016 FXS Rear brake light comes on way too late]
- Is there an adjustable pedal brake lever?
- Rear Brake Pedal mods
- DSR Rear brake lever height adjustment
