SDS Platform/Tail Plastics Removal
From Unofficial Zero Manual
< SDS Platform(Redirected from Tail Plastics Removal)
This removes the S-Platform Tail Plastics from the bike.
- Note: The author documented the reassembly; removal was inferred. Confirmation would be helpful.

- Notes
- You'll be disconnecting the rear lighting wiring and removing the tail subassembly, and then removing the tail plastics from that.
- The lower plastics removal are particularly difficult, even for dealers!
- Tools
- 3mm, 4mm, 6mm Allen wrenches.
- For the seat bolts: T45 Torx wrench (without top rack) or 5mm Allen wrench (with top rack).
- Phillips screwdrivers.
- Needle nose pliers.
- Steps
- Remove the seat.
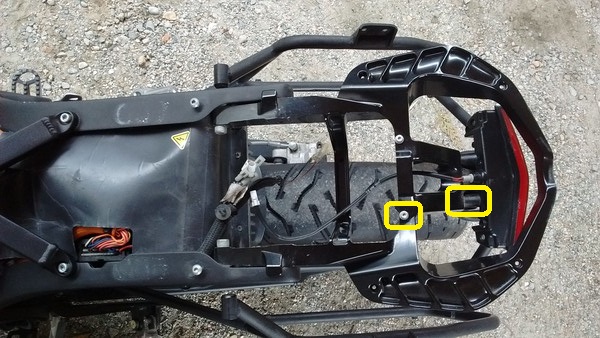
- Remove the black seat pan bolts and nylon washers with the 3mm Allen wrench
- These are located lower on the side, near the hollow frame tube.
- There are 5 pairs of bolts to remove (documented via reassembly analysis):
-
- Use a Philips screwdriver to unscrew the bolt holding down the rear of the plastic controller cover.
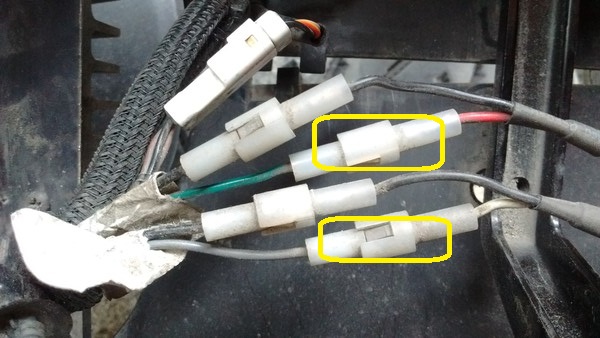
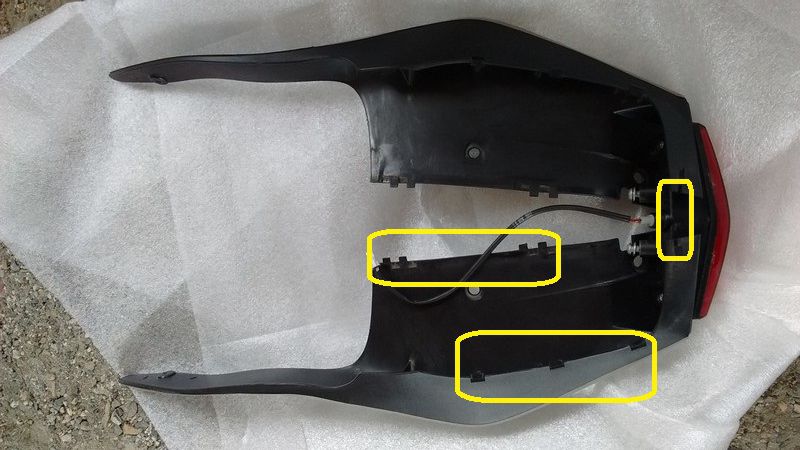
- Cut the cable ties around the signal wires on the left side of the seat area behind the controller.
- Disconnect the turn signal wires and brake light / plate light wires.
- Take a photo to record their connections for correct re-assembly.
-

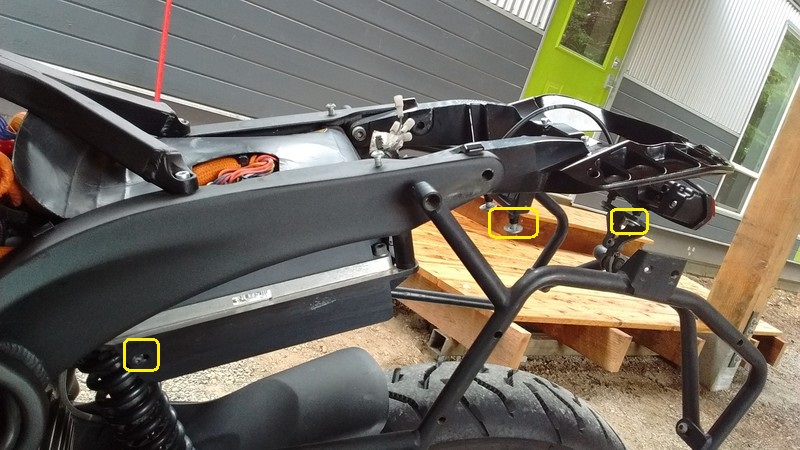
- Remove the 4 bolts that hold tail frame with a 6mm Allen wrench.
- This detaches the tail frame.
- Remove the tail extension using a 4mm Allen wrench. Mind the turn signal wires that go through holes here; draw them through.
-
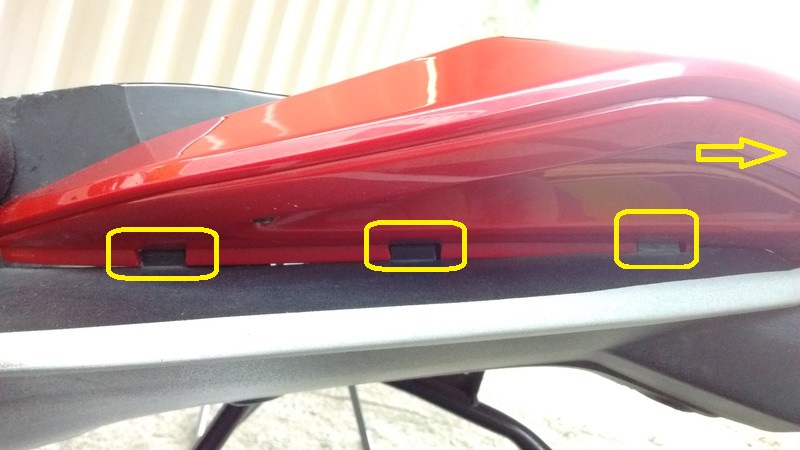
- Remove the black tail enclosure plastics from the cosmetic plastics via the tabs.
- There's also two clips at the end on top of the taillight.
-
- Use a Philips screwdriver to remove 5 screws holding the cosmetic plastics to the frame from underneath.
-
- Use a 3mm Allen wrench to remove the two screws holding the cosmetic plastics to the top of the frame.
-


- Reassembly
- With the tail light off, bolt the top plastic to the metal frame.
-
- Clamp the bottom tail plastic and screw in the 5 screws that hold both pieces together
-
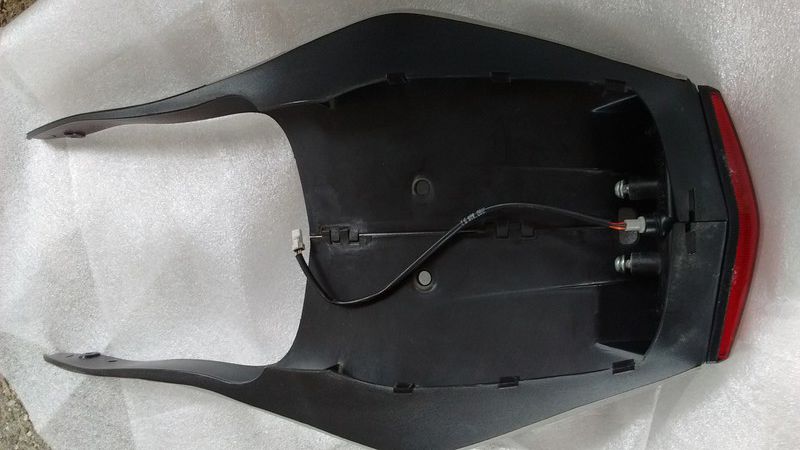
- Here is how the black tail plastic fit with the tail light.
- Notice the "zipper" down the middle.
- There's also a very small one on top of the tail light.
- On the outside are the tabs that clip into the cosmetic plastics.
-
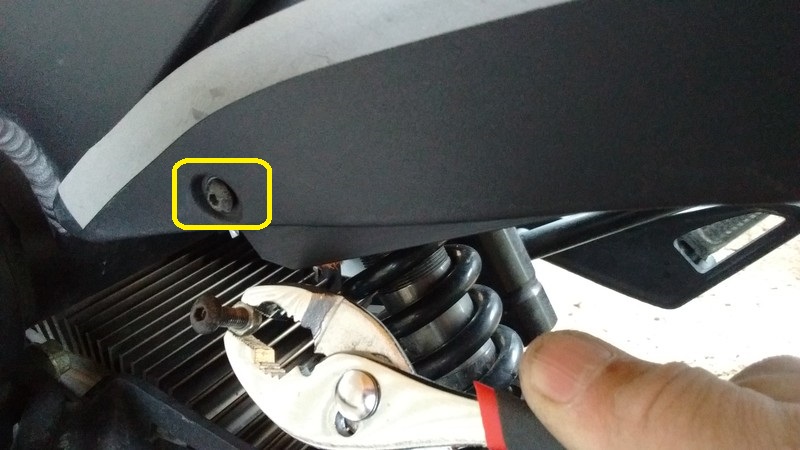
- Loosely bolt the end of the black tail plastic to the frame.
- Note the small nut that's between two fins of the controller.
- It can easily be held with a pair of pliers.
-
- Rotate the pieces up and temporarily (and loosely) attach them to the frame.
-
- Bolt the tail light:
- Remove the temporary bolts from the previous step.
- Push a driver down through the plastic (because of the angle of the taillight bolts).
- "Zip" the plastic back together.
- There's also a tab on top of the tail light that must be fitted properly.
-

- I added duck tape to seal the interior of the compartment to keep it cleaner.
-
- Snap the clips on the cosmetic plastic.
- NOTE: It's not the cosmetic piece that should move but the black piece
- I found it helped to have one hand inside and one hand outside to fit the pieces together.
- There's also two clips at the end on top of the taillight.
-
- Loosely bolt the tail and fit the wires back through the small hole.
-
- Add a new zap strap and tidy things up.
-
- Note that before disconnecting the wires, I took a picture of the set up to be able to match the colours.
- In my case, red goes with green and white goes with grey (confirm locally). In the case of a 2018 SR, it was red/black to red and green/white to white.
-
- Fasten all the loose bolts.
-
- (If applicable) Re-attach the top and side racks.
-


