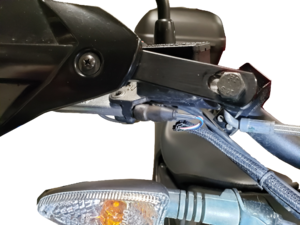
Front Brake Lever
From Unofficial Zero Manual
Zero motorcycles have a right-hand lever for the front brake, as is common for motorcycle designs.
- Primary adjustment
- The brake lever has a dial for adjusting the lever position relative to pad pressure and rider finger reach.
- Set it however lets you operate it comfortably and safely.
- Brake Light and Regen Switch
- A set screw on the inside of the lever adjusts how a micro-switch is depressed.
- The micro-switch is what activates the rear brake light and the "braking regen" mode at the same time.
- Any adjustment or replacement of the brake lever should be followed by recalibrating this set screw to get the desired effect.
- Too much free play and the switch will activate when going over bumps and result in a slightly jerky ride.
- There is some guidance on how to adjust this: Brake Lever Adjustment to Regen Before Pad Contact.
- NOTE: It seems like there's small difference in how this set screw is secured in stock lever compared to replacement lever (2016 SR), even though they look identical.
- I wasn't able to adjust this screw on stock lever, however replacement lever adjusts with no issues.
- You will need 7/64 SAE hex key to adjust.
- Use some light threadlock compound (Blue Loctite will do) to fix the set screw in the desired position if it seems to move too freely out of the desired range.
- References
- Adjustment
- See Front Brake Lever Adjustment
- Removal, Repair
- See Front Brake Lever Replacement

