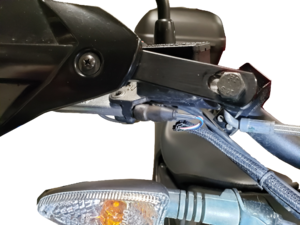
Front Brake Lever Adjustment
From Unofficial Zero Manual
(Redirected from Brake Lever Adjustment)
This is a recipe to adjust the brake lever.
- Mechanism
- The brake light switch on the side of the right hand switch assembly also activates the Custom max regen brake regen level.
- The brake lever at rest normally presses it down (i.e., when you're not squeezing the lever to stop).
- Squeezing the lever increases the distance between it and the switch and the switch gets released to activate the brake light.
- The brake lever depresses the hydraulic cylinder from the front via a push pin, which has an adjustment knob to change the brake lever distance.
- See the Front Brake Lever Adjuster section of the Official Owners Manual for a basic diagram and description.
- Risk/Warning
- The pressure from the master cylinder is what supports the lever to keep the brake light switch pressed down.
- So, when shortening the push pin, the lever becomes more wobbly and more likely to accidentally trigger the brake light switch due to vibrations or wind.
- Also, the brake lever needs to be squeezed closer to the throttle.
- Don't shorten the push pin so much that the lever contacts the throttle too easily, limiting full braking power.
- With good brakes that should not happen, but if you have air in the system your front brake might be squishier than normal and you might not be able to pressurize it fully, thus you may not stop as fast as it would be possible otherwise.
- If your disk brake doesn't engage immediately upon contact with the hydraulic actuating cylinder, you can set the regenerative brake activation immediately after the lever contacts the cylinder.
- Other preventative measures:
- Using a longer or stronger spring.
- Placing something in the spring slot to (slightly) shorten it.
- Increase the friction between the brake lever and its seat by coating the contact areas with paint, etc.
- Tools
- (Optional) 7/64 wrench for the brake lever adjustment knob.
- Small flat-blade screwdriver for the brake light switch set screw.
- (Optional) Light thread-lock compound (Blue Loctite, say).
- Steps
- Adjust the brake lever adjustment knob to engage the brake as loose as seems comfortable.
- Then, adjust the set screw to activate the brake light switch at a certain point in the engagement pull.
- Test ride to calibrate this.
- Ensure it is safe to engage and release.
- Ensure it is not difficult to fully engage the brake pads themselves.
- (Optional) use thread-lock compound to ensure the set screws stay where desired.

