Difference between revisions of "Calex Charger Replacement"
From Unofficial Zero Manual
BrianTRice (talk | contribs) m |
(No difference)
|
Latest revision as of 18:53, 27 September 2018
This describes removing and replacing the Calex 1200 onboard charger.
Since some generations of Calex chargers seem to develop faults relatively often, being able to replace a charger on one's own might save someone a lot of grief who doesn't live near a dealer.
- Video Guide
- How to Remove the Zero's Onboard Charger by NewZeroLand on YouTube shows very clearly how to remove the charger from his Zero SR.
- Notes
- Adapted from these instructions.
- Possibly JAE MX23A18NF1 or MX23A18NF3 for harness connection MX23A18SF1 (datasheet via Mouser)
- Charging enable hack (by EMF user Liveforphysics)
- Tools
- 3mm Allen key.
- Steps
- Unplug the motorcycle, and key it off. Wait for at least 10 minutes to ensure any residual charge has dissipated.
- Remove the lower plastics.
- Belly Pan Removal
- Unbolt the belly pan (2 rows of 4 3mm Allen head bolts on each side of the pan, and 2 smaller bolts) and remove it.
- Unplug the wiring at the rear of the charger area.
- There are three plugs (looking left to right at the rear of the charger):
- One on the AC end of things that's bolted to the bike (your charge plug)
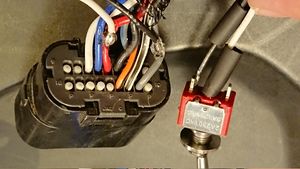
- The comms connector (enable signal, CAN comms etc...)
- One plug on the DC side that goes up to the charge wiring harness.
- The comms plug just has a tab; push in the tab and pull that one out.
- Both of the other plugs are really difficult.
- Removing the DC plug.
- The cables are tucked up between the battery and a frame member, so cut the zip ties (including the zip tie holding the plugs together) and pull the plastic zip-tie mount clips on the lower half of the cable going to the charger.
- Pull down on the charger side of the connector from the bottom while pulling up on the top connector.
- Sometimes this requires a "flesh donation" to the motor, so covering the motor with a rag would be smart.
- Pull the terminals out of the plug housing (see Anderson disassembly), and pull it down thru the hole between the motor and frame.
- Removing the AC plug.
- It loops up under the seat and is zip tied on in a handful of places.
- There are two small bolts on the backside that are difficult to reach, so use a decent set of hex drivers with handles.
- There is a fuse holder plug that connects the ground to (somewhere...).
- Squeeze some tabs to get the green locking piece out.
- Then squeeze more tabs to get the plug apart.
- Now with the cables out, use the 3mm Allen key to loosen (but not remove) the 6 bolts on the tabs holding it up.
- Remove the charger to the side (recommend the right side) by removing the 3 bolts on the side intended for removal.
- On removing the last bolt, support the charger so it doesn't fall out, and carry it to the ground or elsewhere.
- Remove the remaining 3 bolts using the 3mm Allen key if not installing a new charger.
- Assembly
- Assembly is the reverse of disassembly! Really.
- Suggestion
- You can extended the DC wires on the replacement Calex charger, and put the plug set sideways, and up higher to make it easier to get at.
