Difference between revisions of "SDS Platform/Board Mounting Plate Removal"
From Unofficial Zero Manual
BrianTRice (talk | contribs) (link update) |
(No difference)
|
Latest revision as of 06:31, 24 January 2020
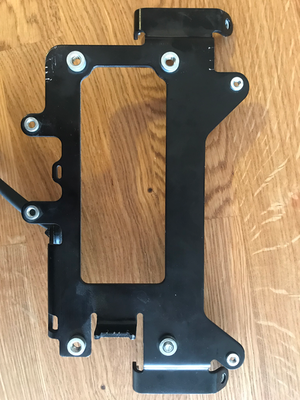
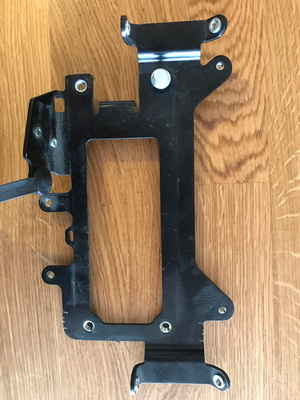
This removes the Board Mounting Plate.
- Tools
- 2.5mm, 3mm, 4mm Allen keys.
- Low clearance (under 20mm) 3mm Allen key.
- Steps
- Remove the seat.
- Remove the underseat Y-shaped frame piece.
- Detach the MBB by removing the two bolts holding it to the plate with a low-clearance 3mm Allen key.
- The right side bolt will be extremely difficult to manipulate given the cables routed very close to it; consider displacing them.
- Push the MBB aside to the left without unplugging its connectors.
- Remove the two bolts attaching the upper left and right corners, facing 45 degrees up/forward, with a 2.5mm(?) Allen key.
- Remove the two bolts attaching the lower left and right corners.
- Reach them from below the frame arms on each side of the bike, just forward of the stanchions.
- Use a 2.5mm(?) Allen key (preferably a ratcheting socket).
- Snip the cable run zip tie on the lower left corner of the plate.
- Snip the cable run zip tie on the lower edge of the plate from the right side.
- A long, narrow-bladed screwdriver can be suitable.
- Detach the Accessory Charging Port from the lower flange of the plate using a 2.5mm(?) Allen key on the two narrow bolts through the plug's body holes.
- Along the lower rear-facing edge bracket flange, push the cross-frame cable run off of the bracket.
-
- Pull the top edge of the plate to the rear of the bike so that the top mounting flange's corners clear the mating flanges on the frame.
- Gently pull the plate by the DC-DC converter up and aft, minding any cabling that can get snagged on the plate to avoid straining any wires.
- It seems easiest to pull the left side of the plate up first, to avoid clearance issues around the hydraulic lines running along the right side towards the rear brake system.
- Installation
- (Still working on this; essentially reversing the removal but considering the various fitment dependencies ahead of time to avoid trouble).


