Happy Trails SU Side Rack Install
From Unofficial Zero Manual
This guides the installation of the Happy Trails SU side rack on an S or DS model.
- Fitted for a 2015 DS originally.
- Shown on 2017 DSR with stock Top Rack Below
- Reference
- Happy Trails entry on our Aftermarket page
- Happy Trails' own install instructions, good on their own
- Happy Trails' Zero SU product page
- Notes
- It is sturdy as a tank, off the bike and on; it becomes practically a part of the bike after installed.
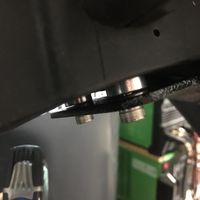
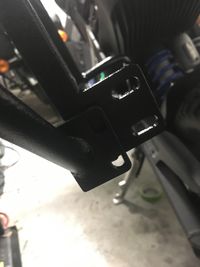
- The tabs didn't seem to be welded all at the same angles and some of the "flat" plates were curved. (see tail plate image below)
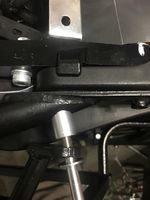
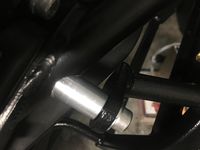
- The spacer going through the stock rack did not go through at a perpendicular angle to the frame.
- I had to remove the rack, then install the spacer / screw separately of the frame to get the spacer to squish into place.
- Even then, I doubt it bottomed out.
- The slots cut in the rack for back bar are barely enough; at first I thought it would never go on.
- The givi rack adapter instructions step 2 doesn't mention the bolts being used come from the givi pack; this caused confusion at first. Don't rely on the Step 2 image being an accurate depiction of the actual screw used.
- One of the plates my givi case had a hard time installing; the other was just tight but "snapped" into place.
- Pictures below do not show seat bracket mounted to seat as another seat mod has been performed to make access easier.
- See instructional pdf for tips for this step if you do not have an easy access mod installed.
- Tools
- Allen keys: 3mm, 4mm, 5mm, 6mm
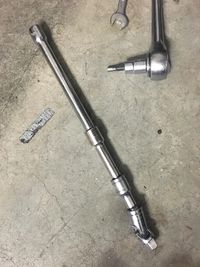
- 13mm side wrench or socket with telescoping extension
- Telescoping socket extension example:
-
- 6" extension
- 3" extension
- 2" wobble extension
- 2" Universal Joint extension
-
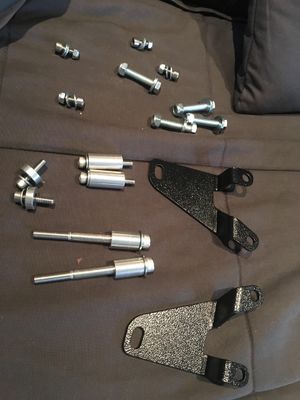
- Parts
- See Happy Trails' instructions PDF above for more details
- Left & Right rack
- Left & Right passenger-peg mounts
- Back Bar
- Bottom Tail Plate
- (4) 8M40 13mm Hex Nut Bolts
- (10) 8M Flat Washers
- (4) 8M Nylon Lock Nuts
- (4) 6M16 Allen Key Bolts
- (2) 6M25 Allen Key Bolts
- (2) 6M45 Allen Key Bolts
- (4) 6M Nylon Lock Nuts
- (12) 5M Flat Washers
- (2) 8M90 Allen Key Bolts
- (2) 5/8 OD, 0.319" ID, 1.25" Aluminum Spacer
- (2) 3/4 OD, 0.319" ID, 0.25" Aluminum Spacer
- (2) 5/8 OD, 0.319" ID, 1.0" Aluminum Spacer
- Instructions
- See Happy Trails' instructions PDF above
- Remove the side plastics for access to the passenger peg mount bolts.
- (You will use a hand wrench from the battery side to access some of the passenger peg bolts)
- Remove the rear fender via loosening the mount bolts with a 4mm Allen key wrench.
- Tape it in place if you don't want it falling out.
- Attach the fender under-fender tab with the spacers.
- Make sure not to pinch the two rear blinker cables when installing the back two spacers.
- Install the left passenger peg tab.
- Use hand or box wrench to remove bottom bolts.
- See passenger footpeg bracket removal for a guide to these bolts.
- Install the right passenger peg tab.
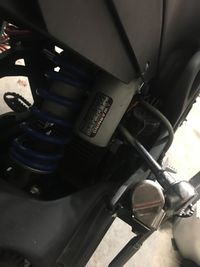
- It is easier if you decompress rear shock to use socket adapters from the other side.
- See passenger footpeg bracket removal for a guide to these bolts.
- Attach the rack via the seat mount bolt.
-
- NOTE: The first image shows the spacer not perpendicular to frame.
- If the spacer cannot insert perpendicular to the frame, you have some options:
- Remove the rack and insert just the spacer and bolt with seat and ratchet it down so the spacer looks like the second image.
- Use a small rotary tool to grind the opening in the top rack bars to make space for the spacer to insert and sit properly.
-
- Attach the rear bar to the ends of the brackets.
- Force left rack out while pulling rear bar in and place one screw at a time
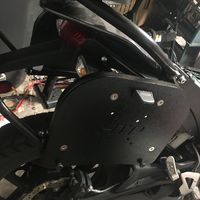
- Install optional Givi adapter plate if purchased separately
