12V Accessory Power Circuit
From Unofficial Zero Manual
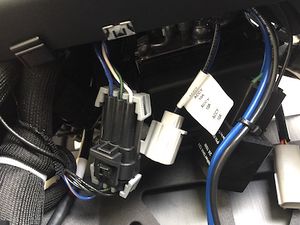
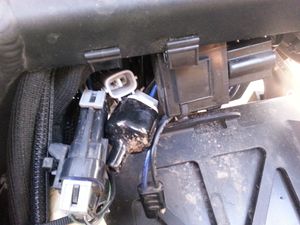
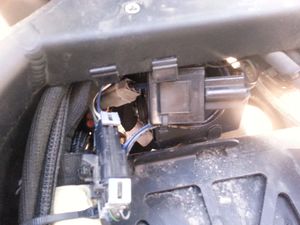
All modern Zero models have a 12V accessory power circuit fed from the DC-DC 12V Converter, ending in plugs under the tank plastics in front of the area reserved for the tank bin or power/charge tank, behind the front wheel.
- They can be accessed by hand without removing plastics but are easier with plastics removed. Both plugs are fed power from the same 10-amp circuit.
- 12V Circuit
- The 12v system on a Zero is very fault tolerant.
- It operates at a very consistent 14 volts, which provides up to 140W (10A) of power available on the accessory circuit.
- The circuit altogether provides 300W total to 2013-2014 models. 2015+ models offer up to 500W but that excess is mostly required for the ABS pump.
- Some owners have used increased size fuses such as 12.5 or 15 amp for even more accessory power.
- Powertrain Impact
- The wattage pulled by the accessory power has a negligible, almost immeasurable affect on range.
- Even at the maximum 140 watt output over 2 hours of straight riding, the 12v accessories would use 0.28 kWh of the total capacity of the battery, which for a ride under 2 hours is about 2-2.5% of the total power available.
- For reference, a heated jacket at full power will typically draw 90W, greater than the stock headlamp at 60W. The impact on the battery is greater if making a very long, slow use of the battery (say, under 35mph for at least 4 hours).
- Sumitomo Connector
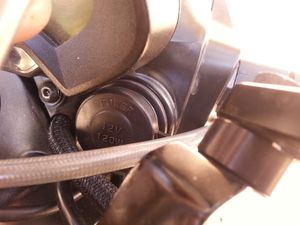
- All 2013+ models have a Sumitomo power connector which is weather sealed.
- Zero's 12v accessories will plug directly into the Sumitomo connector.
- Eastern Beaver makes motorcycle 12V circuitry parts including Sumimoto connectors:
- SAE Connector
- 2014+ models also include a standard SAE connector in the same area on the same circuit and fuse.
- The SAE connector is more common for third party accessories and can be easily adapted to other plugs (such as coaxial for heated gear) very easily.
Patrick Truchon wrote up his 12V port enhancement:
- dual USB adapter
- He shows how he built a splitter and USB outlet into the plastic tank bin.
- Accessing Ports on the S/DS/SR/DSR
- Tools
- Torx T45 wrench (MY2015+) or 5mm allen key (MY2013-2014) to remove the seat.
- 3mm allen key wrench to remove plastics.
- Steps
- Remove the seat.
- Remove the tank plastics.
- Tucked under the frame near the helmet lock, you will see a Sumimoto connector with a cap installed and a SAE 2-pin connector with some dielectric grease on the end.
- With a Power Tank or Charge Tank installed, accessing the plugs and signal relay forward is impeded from behind and above.
- We recommend accessing them from below, using a flashlight and possibly needlenose pliers.
- The Power Tank can be pulled out more easily than the Charge Tank but is very heavy.
- With a Power Tank or Charge Tank installed, accessing the plugs and signal relay forward is impeded from behind and above.
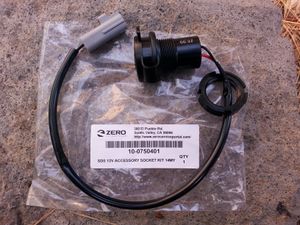
This installs 12V Accessory Socket Kit for 2014+ S Platform models.
- 12V Accessory Wiring Harness for 2013+ S Platform models also applies.
- Reference Video
- Steps
- Loosen collet from accessory kit and set aside
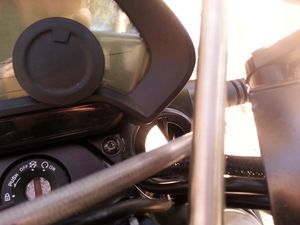
- Remove rubber blank from the right-side plastic shoulder piece around the instrument cluster.
- This is now an extra part you will not be needing while the accessory power kit is installed.
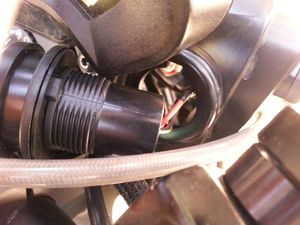
- Feed the wire assembly through the hole in dash and align the 12v socket key into the keyway of the hole in the dash.
- You may want to undo the right-hand turn signal light 2x 3mm mushroom socket head bolts, to get better access and visibility.
- Return collet over wire assembly and rotate to fasten the 12v socket into place.
- Take care not to pinch the turn signal wires.
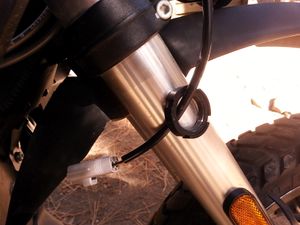
- Route wires to left-hand side and into compartment.
- Remove rubber protective boot from Sumitomo socket and connect to 12v accessory socket wiring Sumitomo plug.
- Button up everything. You are done!
This installs the 12V Accessory Socket Kit for 2013+ X Platform models.
