SDS Platform/Tank Plastics
From Unofficial Zero Manual
The 2013+ SDS Platform Frame features a "tank" area cradled by the two front frame spars and covered by plastic bodywork.
- As delivered, it offers a storage compartment, but can also accommodate systems accessories like the OEM Power Tank battery upgrade or chargers.
- All of the bodywork for this area serve the same ergonomic functions of a traditional motorcycle's fuel tank, allowing grip for maneuvering.
- Fasteners
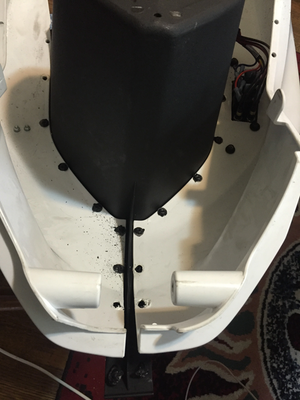
- Zero plastics all are fastened with blackened M5x15mm mushroom cap socket head bolts using a 3mm allen key wrench.
- All have black plastic washers with 5mm inner diameter, 10mm outer diameter, roughly 1mm thick.
- Removal
- See Tank Plastics Removal
- Construction
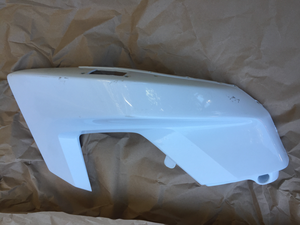
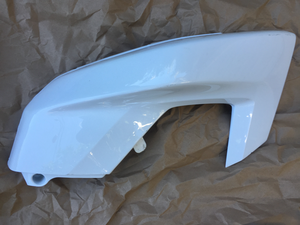
- All variants of the tank plastics for have identical side pieces and a black centerpiece in soft plastic with a relatively rough finish.
- The stock centerpiece for 2013-2016 models is a bin container with two drain holes for collected moisture, with a soft bin held together with a simple zipper that anchors via hook-and-loop patches at the bottom of the bin as well as a loop cord that hooks through the front helmet lock.
- The bin delivered per model year is different and varies in quality. 2013 seemed to have better construction than 2014-2015 years, and 2016 is somewhere between.
- As of 2017, the stock centerpiece is a locking storage container with a spring-loaded hinge at the front so it swings forward to open.
- The Power Tank and Charge Tank have tank plastic options which can be bought separately or selected for color customization. Both use a relatively flat surface for the centerpiece, and the Charge Tank has a cutout for a J1772 inlet hold with built in waterproof cover with a spring-loaded hinge.
- Separating
- The join between the centerpiece and side pieces of a Zero tank plastic assembly is made by plastic weld using a soldering iron into soft hollow plastic pins on the centerpiece that melt and flatten around a lock washer onto holes in the side pieces.
- You can break these welds using a relatively careful use of a pair of pliers to basically grip hard and twist on them until they break.
- It's a slightly frustrating process but pretty quick to achieve, in about an hour. A soldering iron or extremely narrowly-focused heat gun can help the process but try not to risk damaging the plastics from overheating.
- The original join process can be repeated for the new centerpiece.
- Also, this means that the plastic centerpiece you remove will not be re-joinable.
- Repair
- See Tank Plastics Repair for a way to re-join tank plastics that have been de-welded.
- Articles


