OEM Top Rack Install
From Unofficial Zero Manual
This is for installing the Zero Top Rack on SDS Platform models.
- This process takes about 15 minutes and is very easy.
-


- Video Guide
- Zero motorcycle - How to install a top case mount and case by Alternative Standard on YouTube
- References
- Adapted from this forum thread: Zero top rack and GIVI case install.
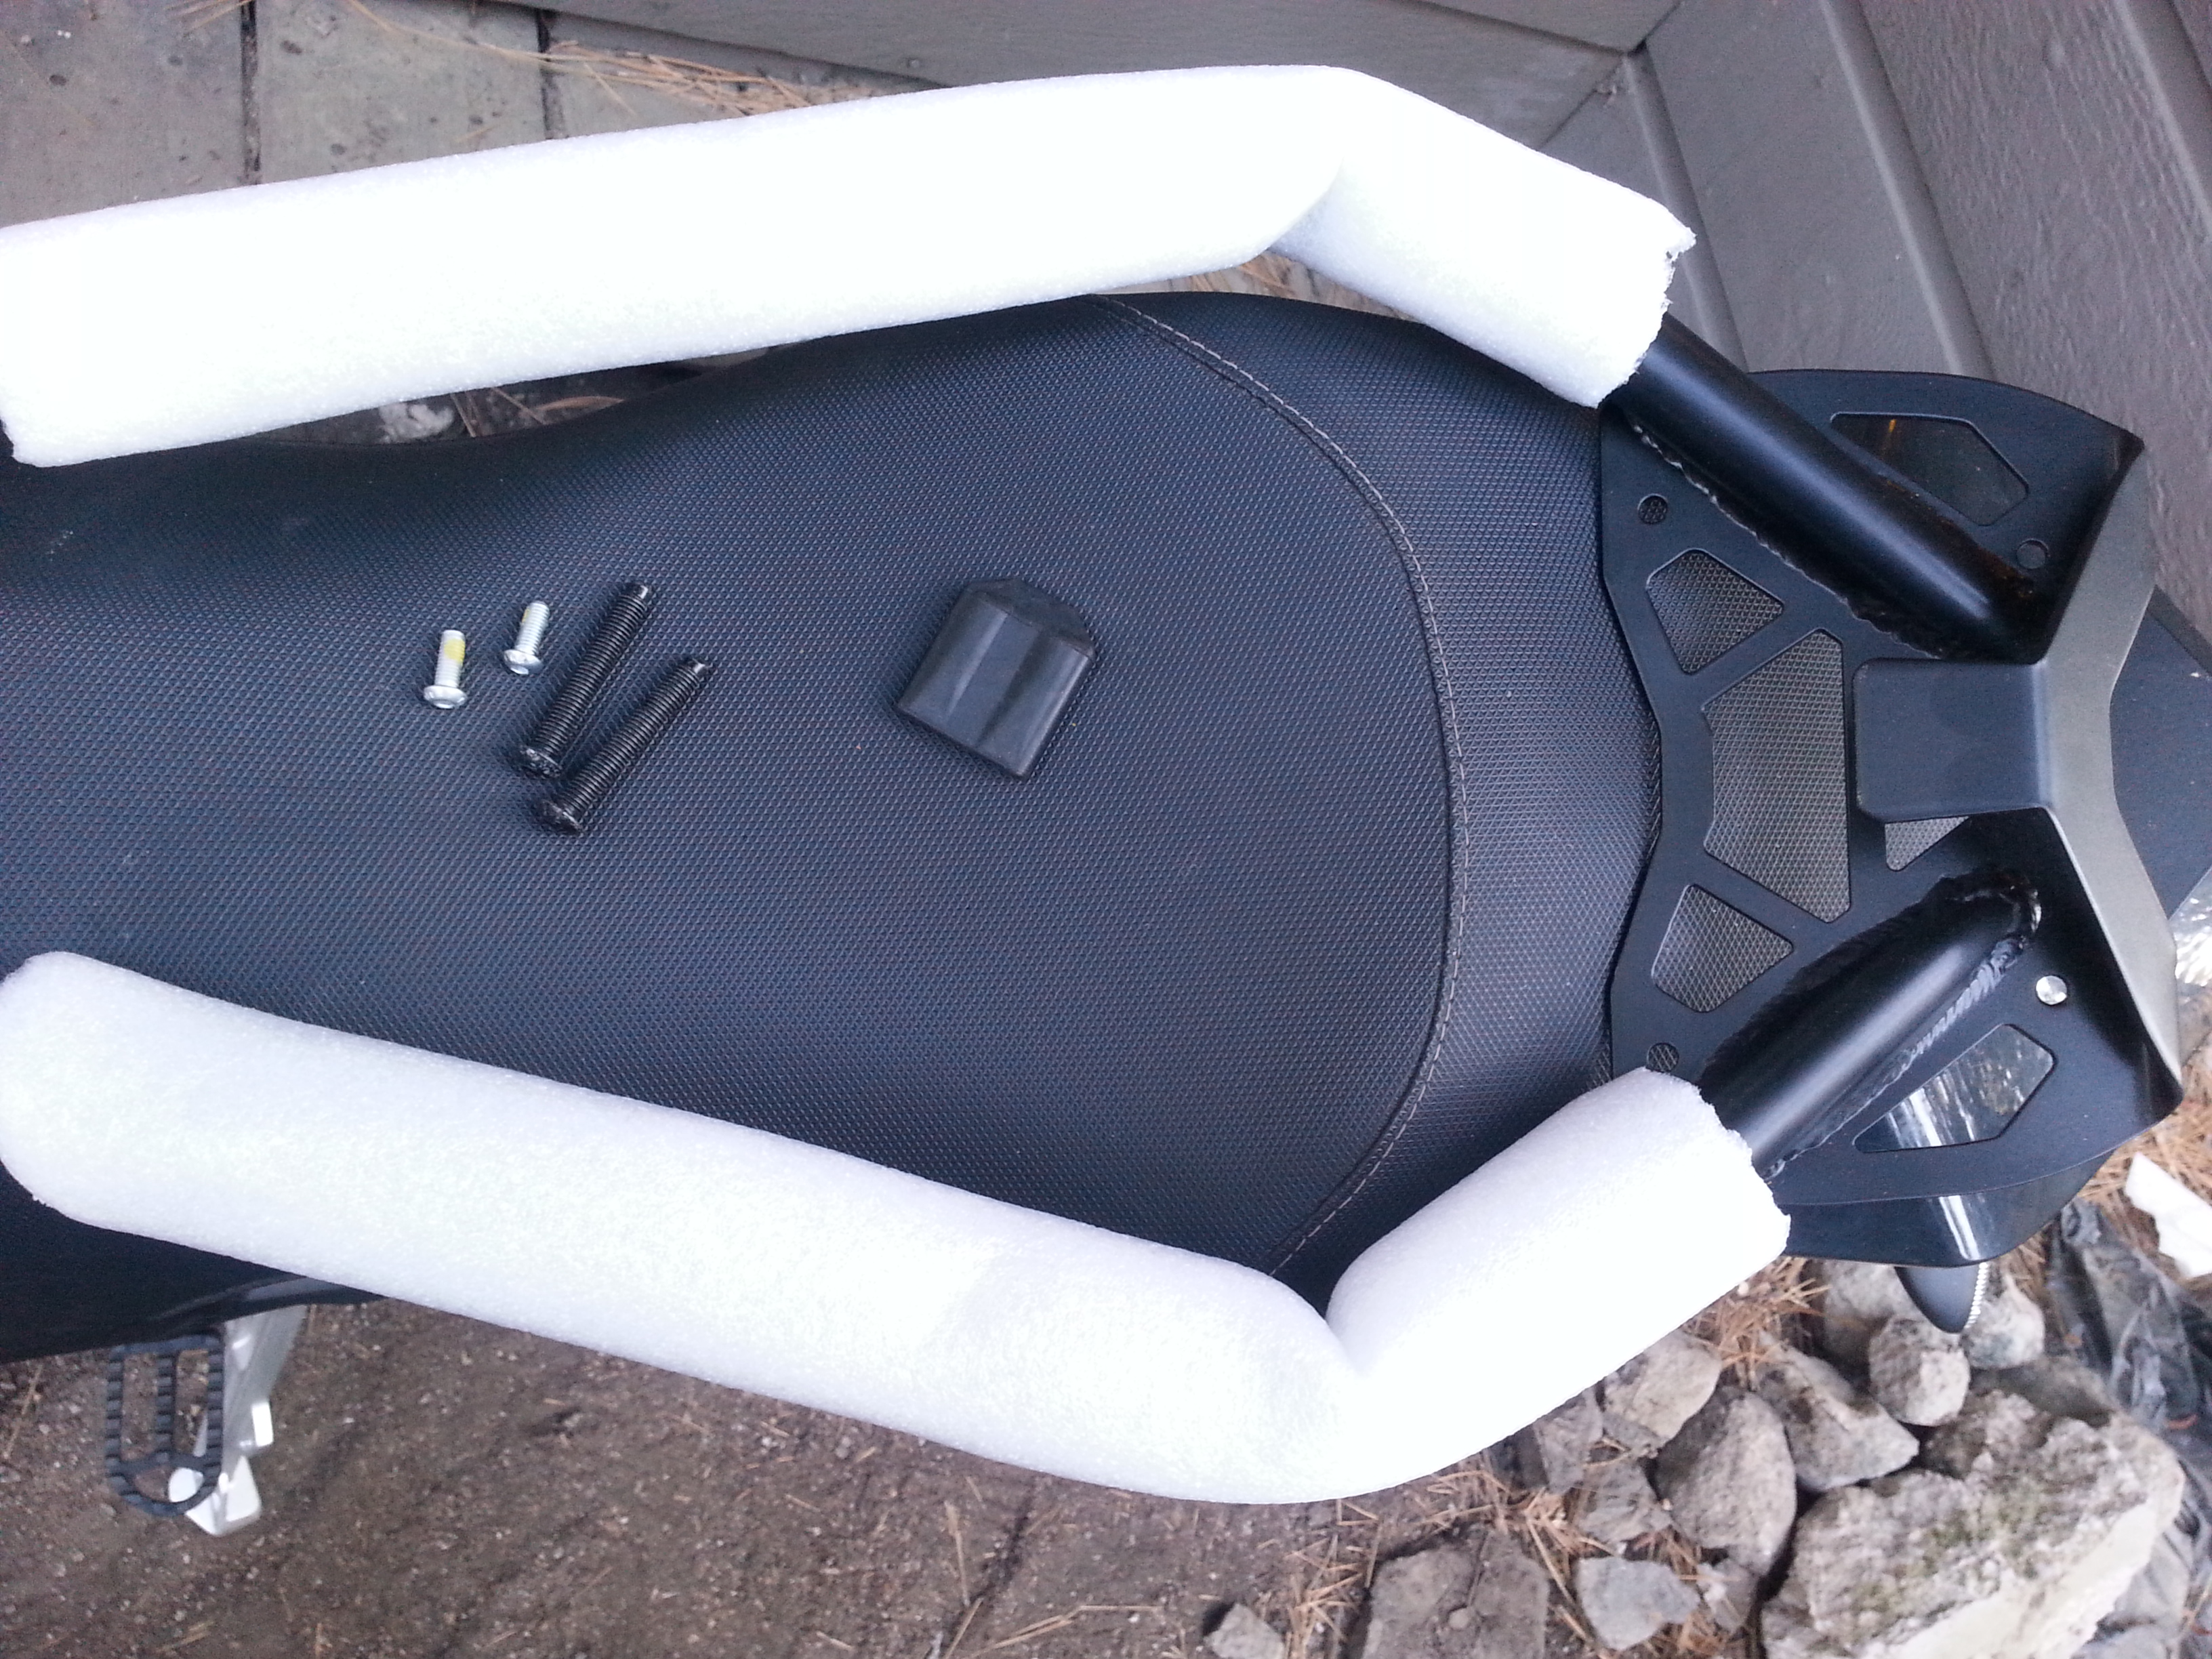
- Parts
- (2) Hex socket button-head bolts (M6⨉16-8.8)
- (1) Rack steel hardware
- (1) Rubber bumper
- for 2013-2014 models (2) replacement seat bolts M8⨉50 with rounded ends
- Tools
- M4 Allen key for the button-head bolts
- for 2013-2014 models M5 Allen key for the replacement seat bolts
- for 2015-2018 models T45 Torx wrench for the seat bolts.
- Instructions
- Remove the seat.
- Place the rubber bumper over the tab that extends from the top plate.
- This will rest on the end of the tail plastics, and avoids scratching them.
-
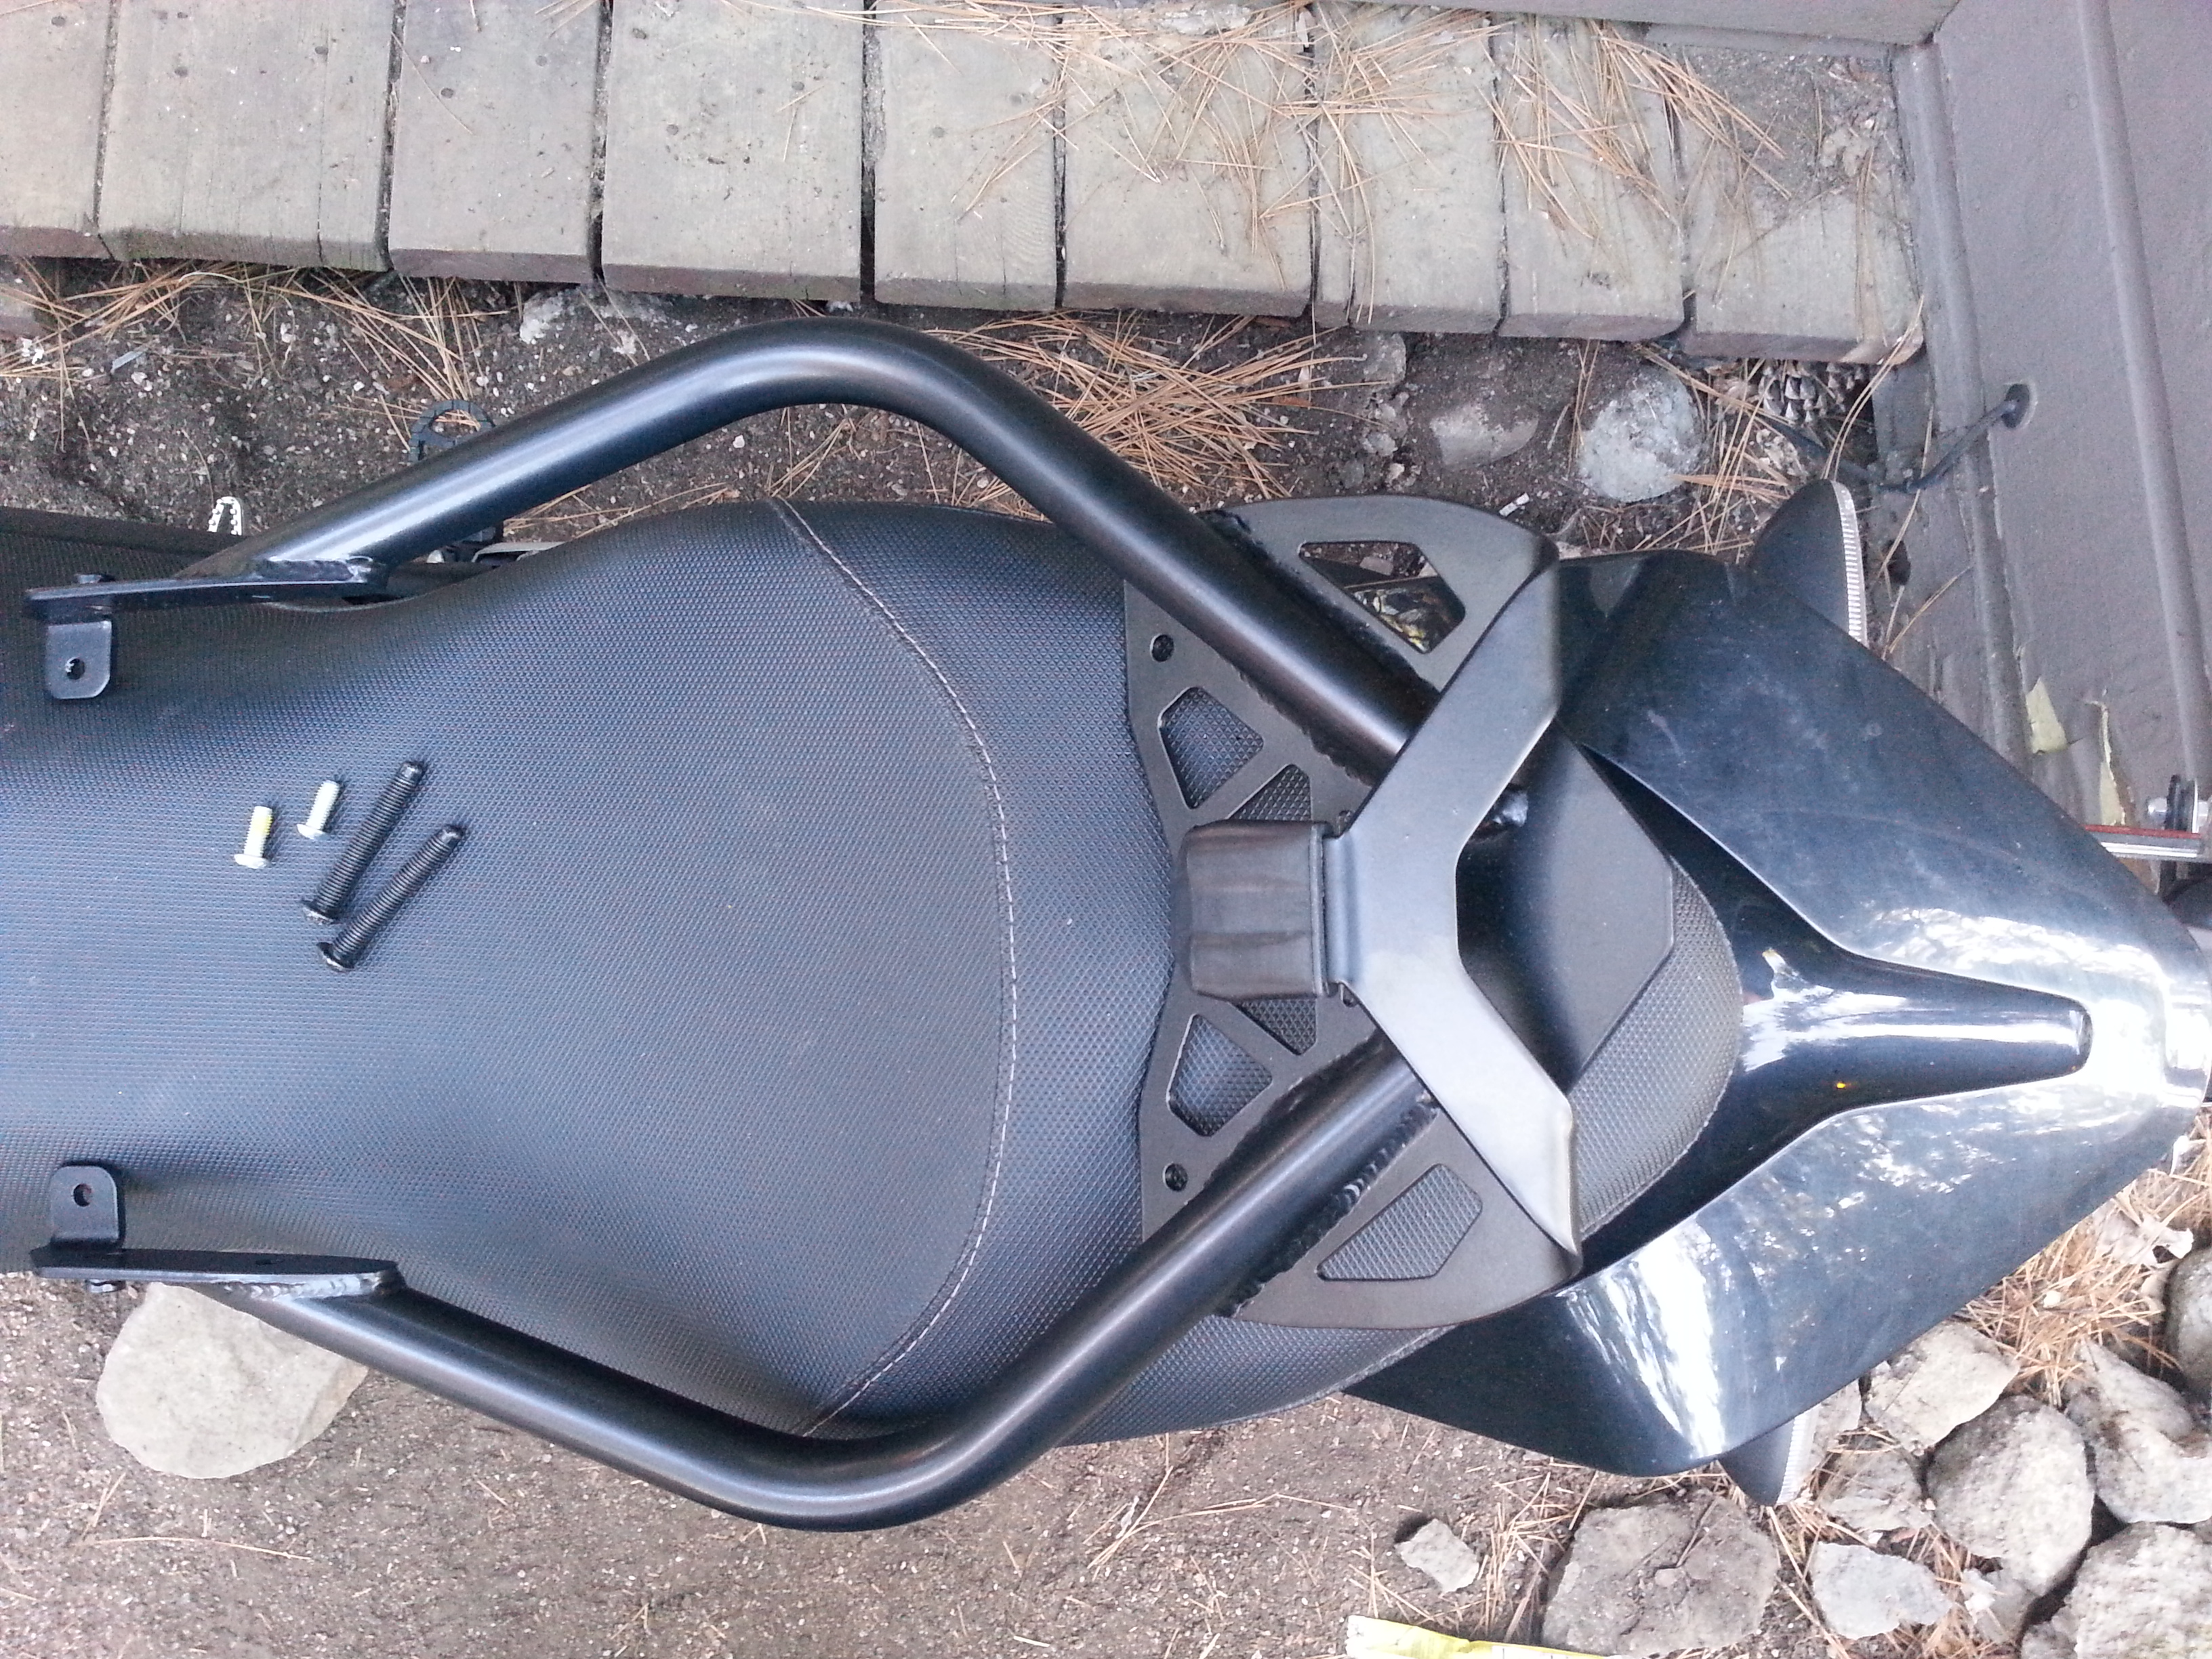
- Set the rack hardware onto the tail.
- The tab that extends from the top plate should point downwards and rest on top of the end of the colored tail plastics.
- At the front of the rack, align the bolt holes:
- Align the side holes with the seat bolt holes.
- Align the top holes with the holes on top of the frame's tail members.
- Ensure the front and back of the rack rest in contact simultaneously.
- The goal is to minimize the dynamic load on the small mounting bolts while riding.
- Hitting bumps at highway speed (if the tail can move freely) can add up over time and break the mounting bolts.
- Place a washer under the front part of the bracket, or
- Put some adhesive firm padding on the tail to support the tab.
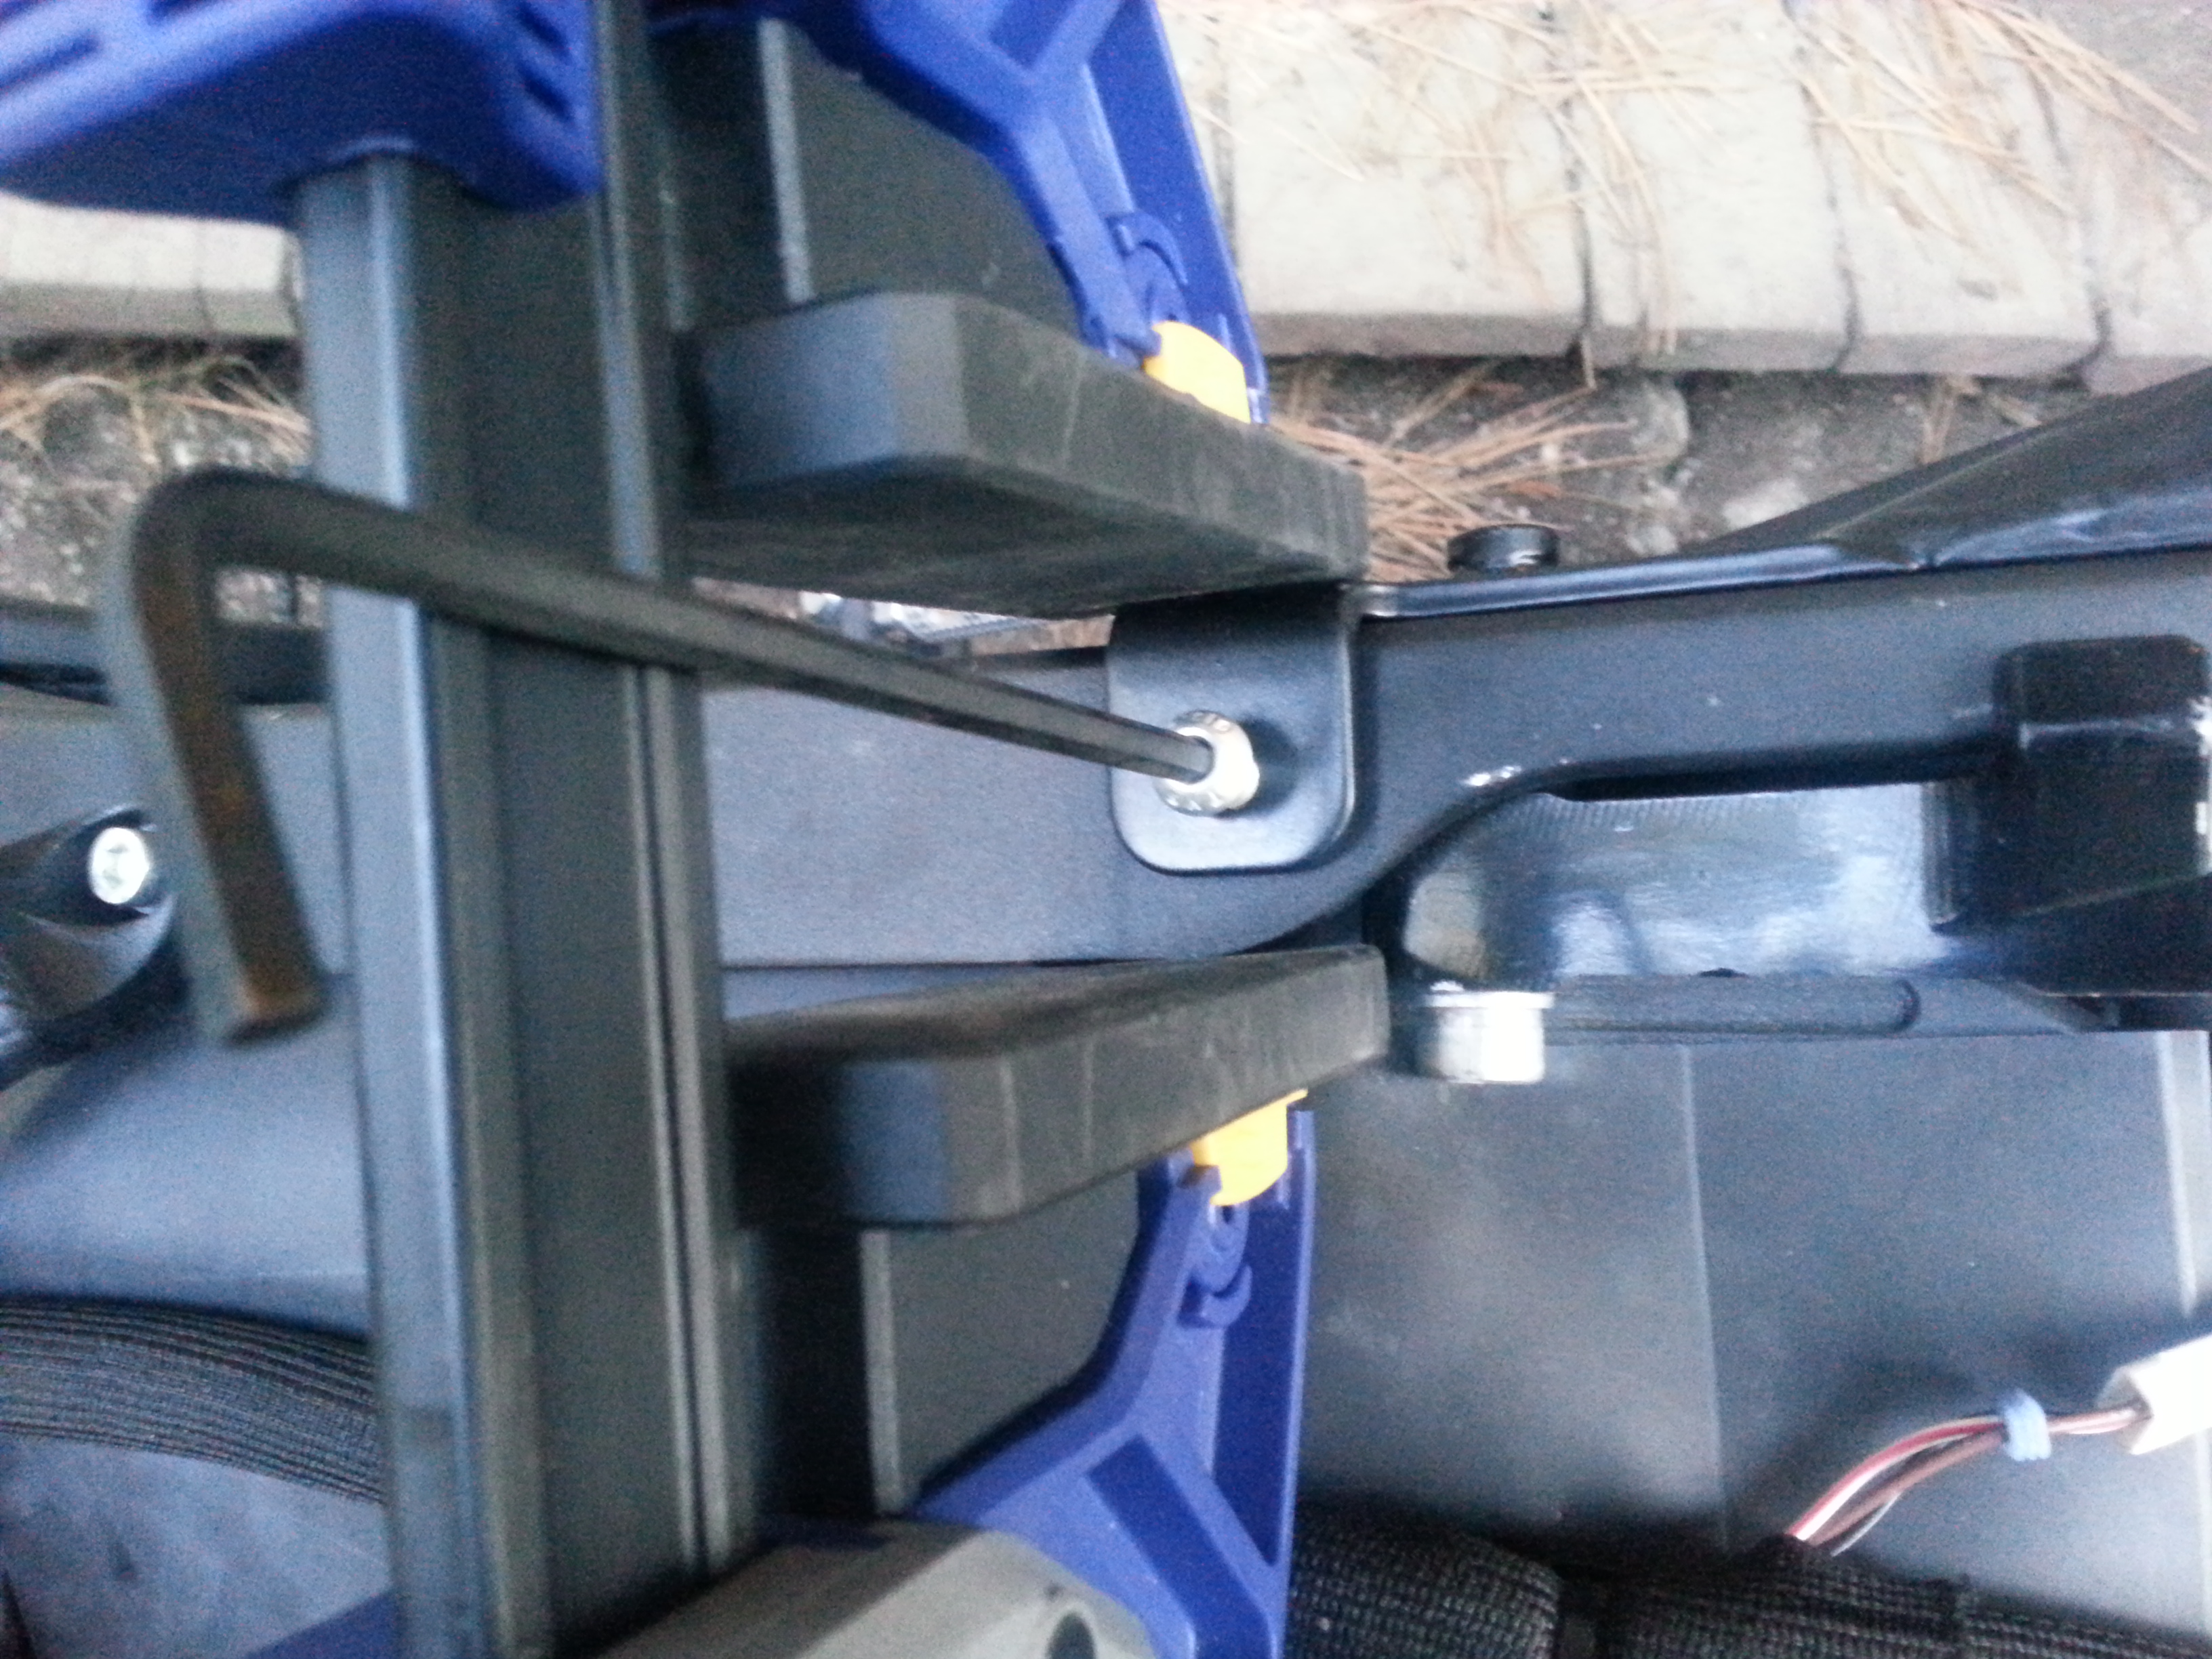
- Fasten the top-front of the rack with M6 bolts to anchor the rack bracket to the top of the frame under the seat.
- Use a light thread-locker fluid to secure these bolts.
- Torque the bolts to 6 ft-lb.
-
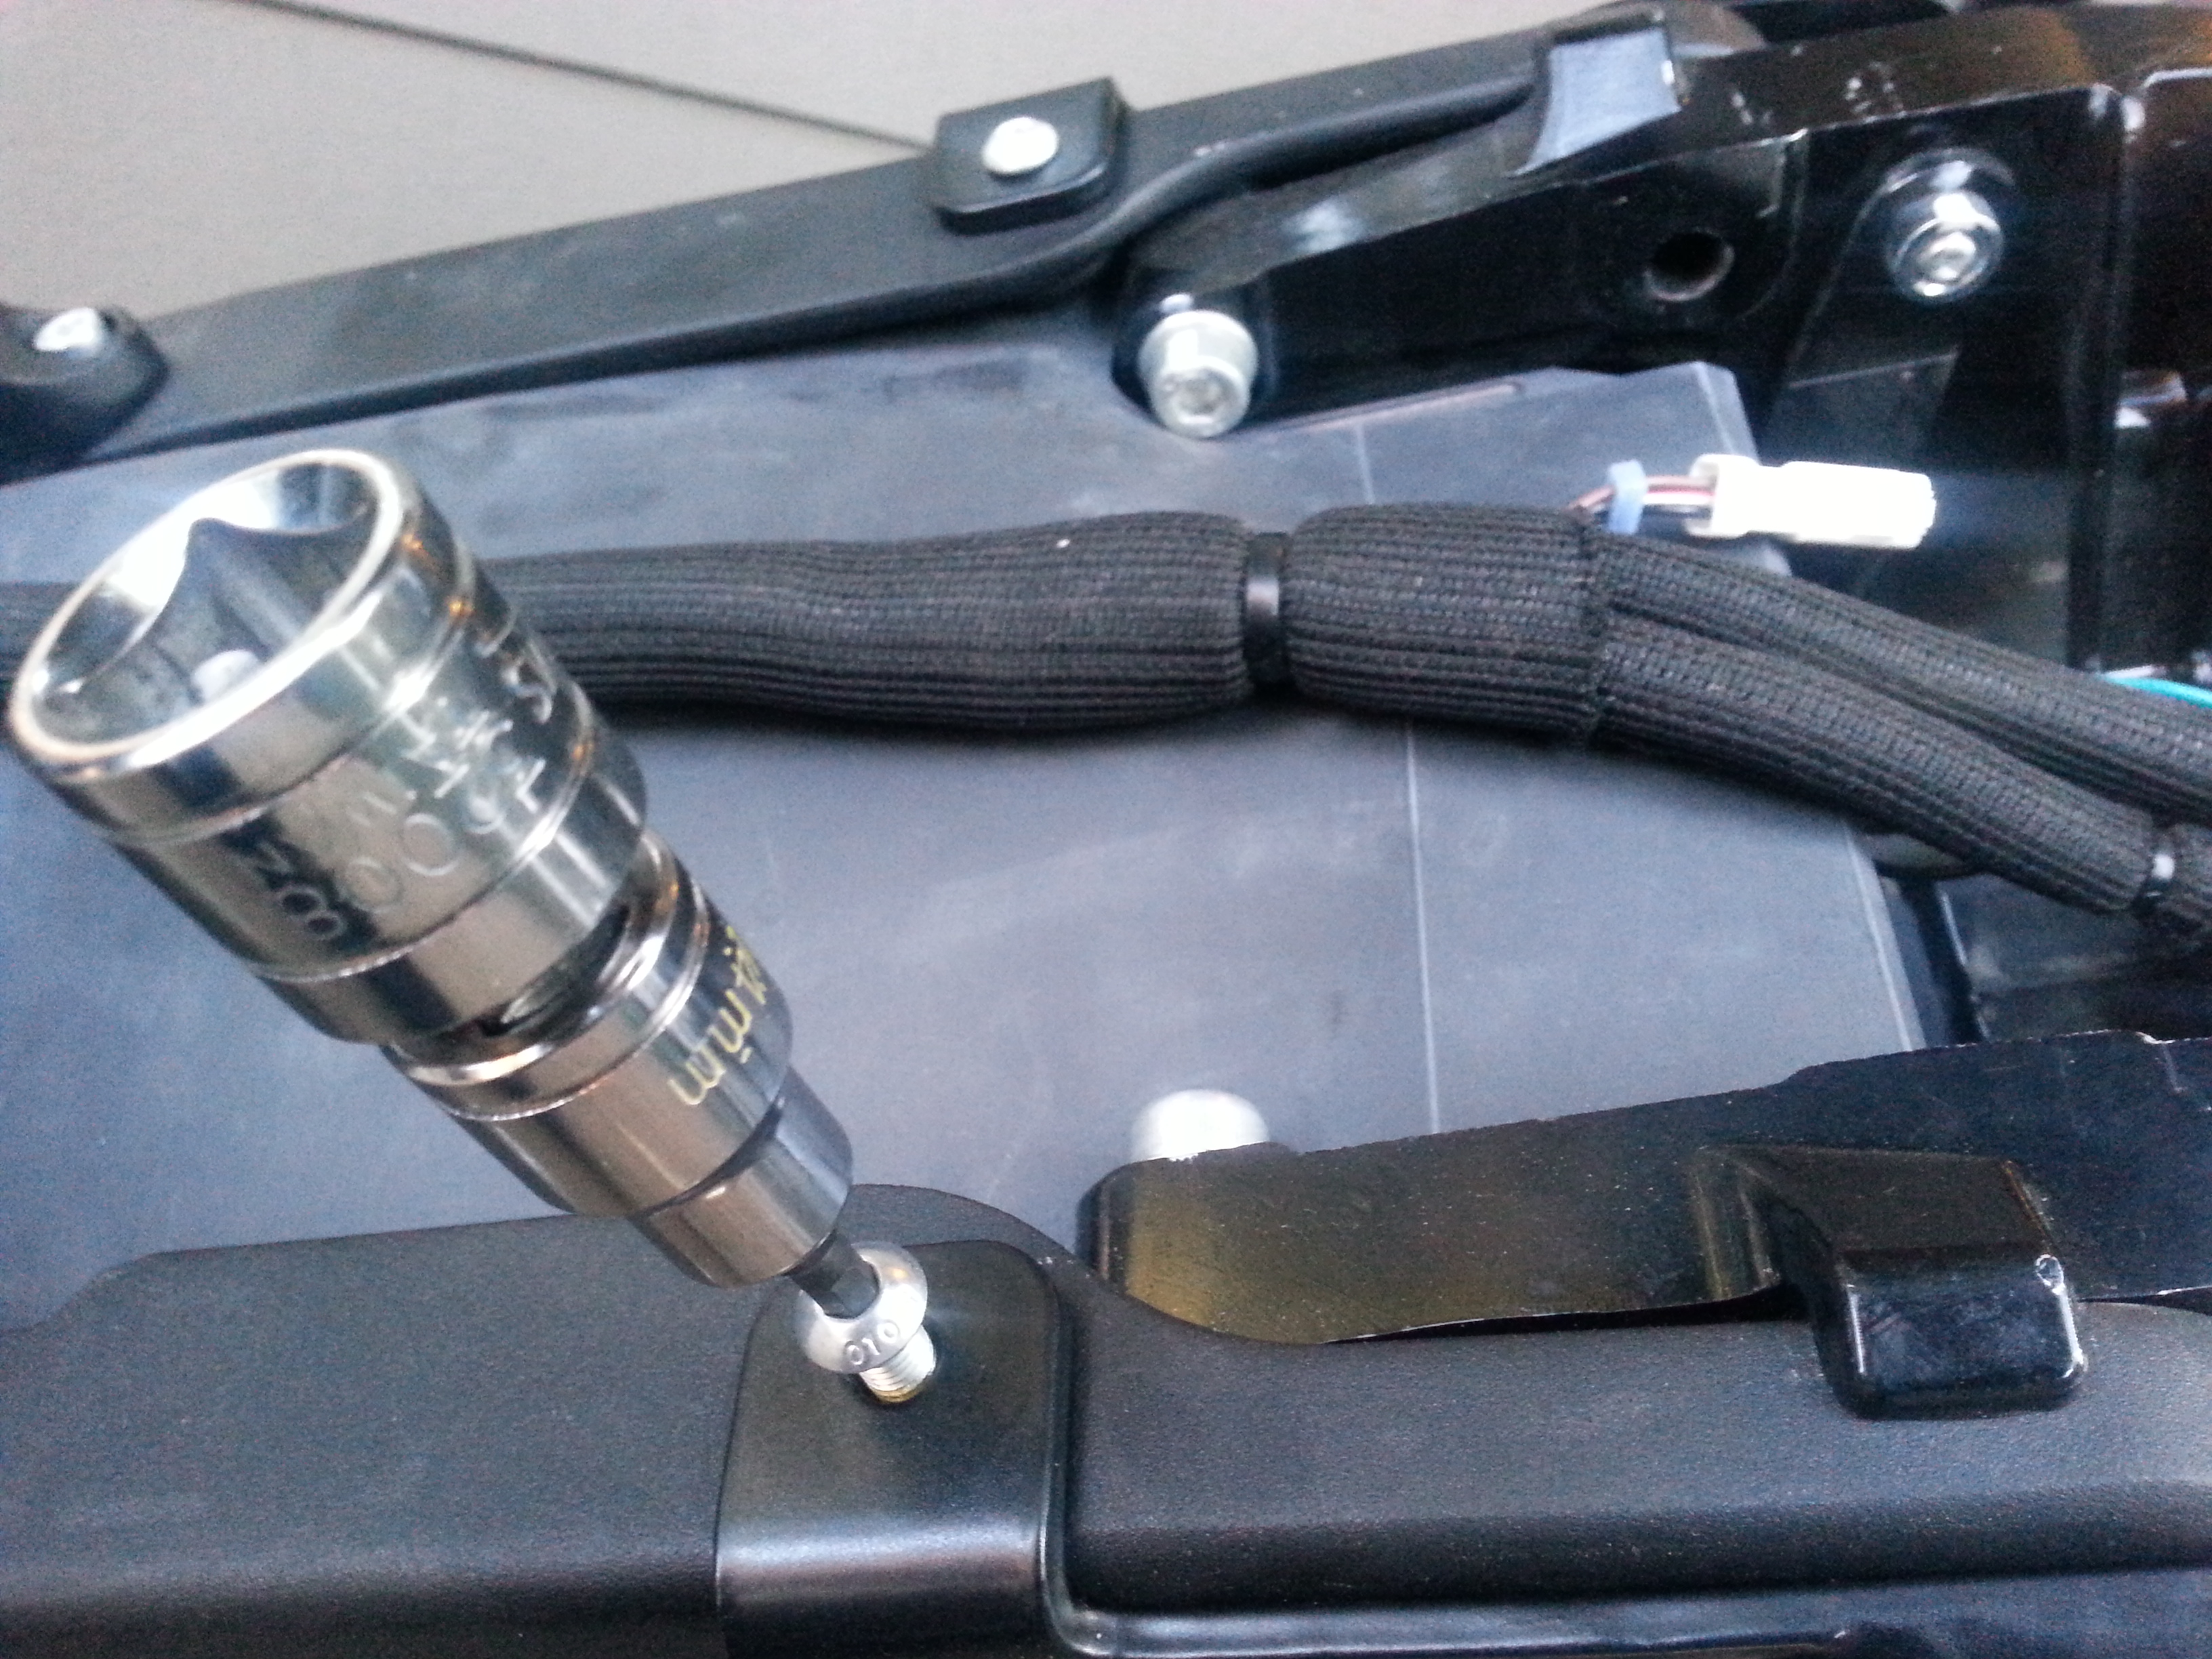
- Replace the seat and tighten the T-45 Torx bolts (MY2015+) or 5mm socket head bolts (MY2013/MY2014; extras are provided) back in through the rear rack frame.
- Torque the bolts to 16 ft-lb.
-


- Loading
- Once the top rack is installed, the bolts holding the seat on are load-bearing.
- If the tab under the tail rack does not directly contact the tail plastics while unloaded, going over bumps at speed can wear on the mounting bolts over time and might break them.
- Fixing a cushioned (rubbery) spacer underneath it will dampen this dynamic load.
- If you need to remove the seat, take off the top case or remove any heavy contents to avoid stressing the rack over time.
- Side racks (both OEM and Happy Trails) are installed in a way that somewhat stabilize the dynamic load on the top rack, but it's still fundamentally vulnerable to a lever effect on the bolts holding it down.
- Plate Adapter Compatibility
- The Givi M5 adapter does not fit the Zero factory rack without having made some hardware modifications to the plate.
- Non-Givi adapters will likely require similar customizations unless they are made for the same fastener geometry.
- The plate is made of steel so make sure to coat any exposed surfaces from drilling with paint etc to minimize corrosion.