Gen2/Accessory Charging Port
From Unofficial Zero Manual
< Gen2(Redirected from Accessory Charging Port)
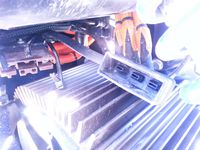
The Gen2 platform includes a charging circuit terminated by a hard-mounted brown Anderson SBS-75X connector to support OEM and third-party additional chargers.
- Input
-
 Warning:
 Only supply DC power to this port in the battery's normal range, or risk catastrophic damage to the battery. - All external chargers are switching power supplies that turn AC (or sometimes DC!) power at a wider range of voltages into DC that behaves well with Zero's battery technology and voltage range.
- 2012 Zero batteries operate in a lower voltage range than 2013+ Zero batteries; chargers for one range of years should never be used on another range of years.
- To use
- Remove the rubber boot cover and plug in the charger(s).
-
- As delivered, the rubber boot cover will be secured with zip ties. Remove them first.
- 2013 models do not include the rubber boot; it is a good idea to install one to protect the plug over time, though.
-
- Use the onboard charger in conjunction with the accessory charging port to keep the motorcycle in charging mode (allows keying off while charging among other things).
- Replace the rubber boot after unplugging the charger(s).


| Platform | Years | Location |
|---|---|---|
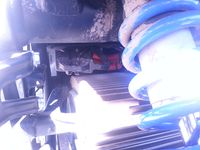
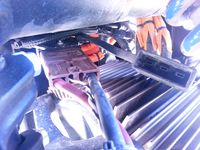
| X | 2013+ | Forward of the motor on the right lower side of the frame, under a plastic panel with 5 fasteners. |
| S | 2011-2012 | Right side of the battery. |
| 2013 | Above the motor on the right side (opposite the ODB-II port). | |
| 2014+ | Above the motor on the left side (more accessible than 2013), covered by a rubber boot. |
- Location


- Mounting (SDS Platform)
- One or two small H2.5 Allen key socket head bolts run up through the connector's holes into a collared insert on a flanged edge of the board mounting plate.
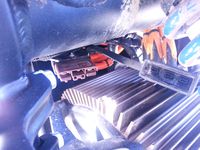
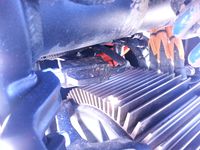
- Detaching (SDS Platform)
- Remove the left lower plastic panel first for access.
- Either:
- Use a very low overhead / right-angle H2.5 Allen key wrench from the left side of the bike ahead of the vertical frame stanchion.
- Pull the board mounting plate up by enough room to fit a right-angle Allen key underneath, between the connector and the motor fins, about an inch or two.
- Enable Line
- The Anderson SBS-75X connector has two signaling pins which the Gen2 employs in conjunction with a feature of the Zero Quick Charger to indicate charger presence.
- The feature is not completely understood, but it operates this way:
- When the contactor is shut, if the enable line detects charger presence, the contactor will remain shut until or unless the enable signal is removed, or a safety limit is detected by the BMS requiring opening the contactor.
- The enable line has no effect if the contactor is open.
- Implementing the feature has been performed in various ways.
- See the XMX off-bike charging article for enable pin wire-up or charging Y-cable fabrication for how to combine enable signals safely.
- One minimal implementation joins the two pins in a simple 100kΩ resistive circuit.
- Full pack voltage would supply 1mA current to such a circuit at most, so a high-current wire is not needed; just a solid circuit pinned appropriately for the connector with an inline resistor and weather+abrasion+strain-proofing).
- Warning:
This implementation has not been officially vetted by Zero, and there may be unknown effects operating with such a circuit long-term
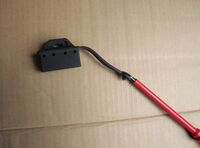
- Removing the rubber boot
- Only for when you are replacing the Anderson connector permanently with another type/shape of connector.
- The rubber boot is held by a nylon "fir tree" plug.
-
- Use a flat tool (screwdriver, nylon pry tool, etc) to wiggle between it and the mounting plate until loose.
- After removing, you can install the rubber boot elsewhere using (for example) an M5 bolt and some washers.
-